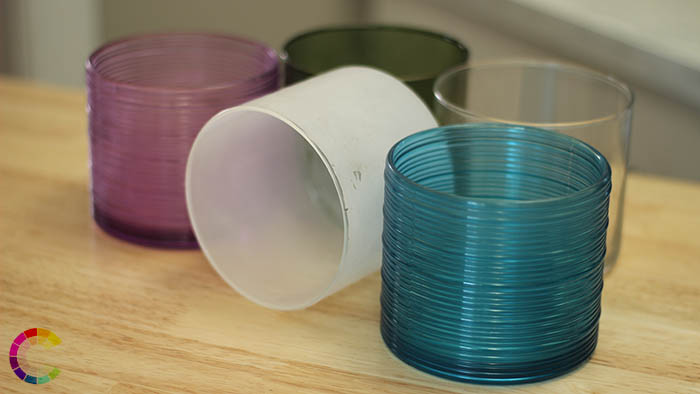
Candle jars are often beautiful, and by removing the wax, you can repurpose the jars for decorative purposes, or even reuse the jars to make more candles. Previously I made a video on how to reuse candle wax by melting the wax in jars on the stove, then transferring all the hot wax to a new jar with a fresh wick. However, this method can be time consuming. How can you remove leftover candle wax from a candle jar? This video is part 2 in my series on reusing candle wax.
I got a lot of great feedback via comments on my YouTube channel from viewers on more ways to remove wax from jars. I’m currently stuck in the house due to the COVID-19 outbreak, so it’s the perfect time to try out your suggestions! If you have a tried and true method of removing wax that’s not described in this video or my previous video, please let me know in the comments and I’ll give it a try as well in a future video!
Based on your feedback, there seems to be 5 main ways that you all remove the wax from your old candle jars. Let’s try them all!
Before we begin, just a quick disclaimer to try any of these techniques at your own risk. Always take care when handling hot wax!
Video Tutorial: 5 Ways to Remove Candle Wax from Glass Jars
FYI: This content was originally developed for the Craftcore DIY YouTube channel, and I’ve embedded it here below. If you prefer to read a transcription instead of watch the video, please scroll below for that information. (Transcription has been edited to make it easier to read as a standalone article.)
Method #1: Stove Top Melting
This is the method I described in my part 1 video, so I won’t go into detail here. An advantage of this method is that it’s pretty fast to melt the wax once the water reaches a simmer. The disadvantage is that it’s a bit cumbersome to transfer the wax once it’s melted since the wax is contained in the jars.
Let’s move on to viewer suggestions!
Method #2: Hot Water Removal
I heated up my water kettle to 100 degrees. Once heated, I poured the hot water directly into the jar. The wax from the bottom of the jar will slowly rise to the top of the water. The wax will bubble up from the bottom and looks so cool.
For my first attempt, I only waited about an hour and a half, and you can see in the video that although the wax appeared hard, it was actually still a bit soft whe I used a knife to try to pop it out. Since the wax was somewhat soft, the wax didn’t pop out easily. I ended up pouring out the water from the hole I made in the wax and removing the soft wax in chunks.
If the wax layer at the bottom is too thick, you might have to repeat the process a second time. When I tried this method, about half the wax rose to the top but I still had a significant layer at the bottom that didn’t rise before the water cooled down.
Since I still had a significant amount of wax at the bottom of my jar, I poured more boiling water into the jar and this time, I waited much longer – about 5 hours. This time, the wax had hardened perfectly and it came out as one big piece. This was a success!
I used a sturdy spoon to remove the wick bases from the bottom.
Pro:
It’s very fast to prepare the candles for removal, so the active time you need to spend on this method is low. Additionally, most of the wax was removed, so all you would need to do is clean out the residual wax with soap and water to be able to reuse the jar.
Con:
You have to wait for the wax to solidify before you can remove it from the jar, which does take a long time. Since I had to do it twice, it took even longer.
Method #3: Frozen Wax Removal
This candle has been in my freezer for a few days but it shouldn’t need that long to freeze. I used my butter knife to cut the wax, and it really was easy to just pop out the wax in chunks. Yep, it was that easy!
The pros and cons of this method are very similar to the hot water method:
Pro:
Prepping the candle is fast (a huge pro) since it’s literally just placing your candle in the freezer. When putting it in the freezer, make sure that the candle is at room temperature to reduce the risk of your glass cracking due to extreme temperature shifts.
Con:
The con is that you have to wait a while for the candle wax to freeze, but you can always freeze it in advance so that you’re not actively sitting around waiting.
Method #4: Double Boiler
For this method, I made a DIY double boiler using a saucepan and a metal bowl. I brought water to a boil, making sure that the water wouldn’t directly touch the bottom of the bowl. Once it boiled, I reduced the heat to medium low.
I put the bowl on top, then placed the used candle jar on top. Then, I waited. And waited. It took a long time for the wax to melt for this candle – about 40 minutes.
Since the jar wasn’t exceptionally hot, I was able to use oven mitts to transfer the wax from the jar to a small heat-safe bowl lined with parchment paper. Once the wax hardened, it was simple to release the wax from the parchment paper to add to my collection of wax pieces.
Con:
The cons of this method outweighed the pros for me. It felt much slower to melt the wax on the double boiler compared to submerging it.
Method #5: Oven Bake
This method is great when you’re removing wax from many candle jars at once.
I didn’t want to risk cracking my jars, so I preheated the oven to a low temperature of 200 degrees fahrenheit.
I wasn’t sure if it was a good idea to put the labels in the oven or not, so to be safe, I washed the labels off first. If you soak the jars, most labels will peel right off, and you can carefully scrub off any leftover bits.
I lined a baking tray with tin foil, then a layer of parchment paper. I placed my candles upside down on the tray, to allow the wax to drip down onto the parchment. I’m mostly using candles that I’ve already removed wax from, so this is mostly to remove the residual wax left in these jars.
I put the tray of jars into the oven for about 15 minutes. Once done, I transferred the jars from the tray to parchment lined plates. I pulled out any wicks using tweezers. I let the wax solidify on the parchment, and then removed the wax in chunks.
I didn’t worry about removing any debris, because in a future video, I plan to test straining out the debris.
Pro:
If you have a lot of candles to do at once, this is effective. I still had wax in the jars after 15 minutes, but your mileage may vary if you extend the time.
Con:
It might take a while to get the candles to fully melt.
Bonus Method #6: Just a Butter Knife
So for this one, I just have a used candle that is fully hardened at room temperature. I haven’t frozen it, and I haven’t warmed it in any way. As a comparison to the five previous methods, I wanted to try to use just a butter knife to break the wax in half.
So here we go. Honestly…it wasn’t actually that different from the frozen method. With the freezer, it was a bit easier to remove, probably because the wax contracts a little, releasing from the walls of the jar. But just using a knife wasn’t actually that difficult, leaving a similar amount of residue that would need to be washed off. Maybe I should have tried this method earlier…
In Summary
So after trying all these methods, which one is my favourite?
My absolute favourite method is now, drumroll please – the freezer method! I found that the wax removal was the cleanest, and the prep time the fastest. Freeze it, pop it, collect it, then clean the jar. It was so easy. What method is your favourite?
Next Steps
Using any of these methods will leave you with some wax residue that you’ll need to wash off before you can reuse the jars for decor or storage. Using dish soap and warm water is effective for removing both the labels and any remaining wax. Try not to let wax go down your drain.
Whether you submerge your jars in boiling water, pour in hot water, freeze the wax, use a double boiler, or use the oven, you’ll be left with hardened wax pieces that you can then melt again to reuse. You can keep the pieces sorted by scent or combine together similar scents to make a unique combination. In my next candle video, I’ll go through some ways that you can use these bits of wax. Be sure to subscribe to this channel so you don’t miss it!