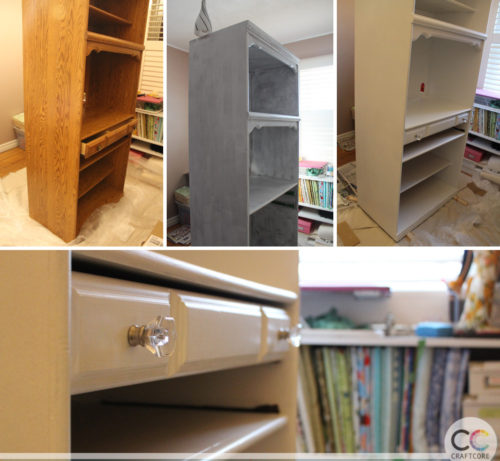
I received this desk with fantastic bones from my friend Lea who was paring back her space. Isn’t the shape of the desk great? I love that it has two rollers; one is a full desk drawer with lots of dividers to keep everything neat and tidy, and one is a roll-away tray, probably meant for a computer keyboard. I love using a keyboard tray for scrapbooking. You can start work on a page, have lots of mess on your work surface, then simply push in the tray to keep your workspace tidy yet be ready to roll it out at a moment’s notice to get right back to it.
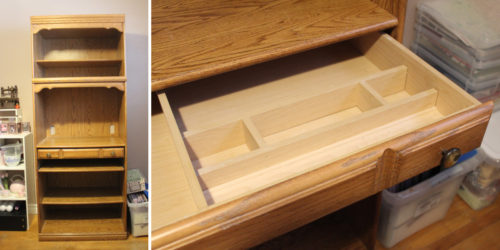
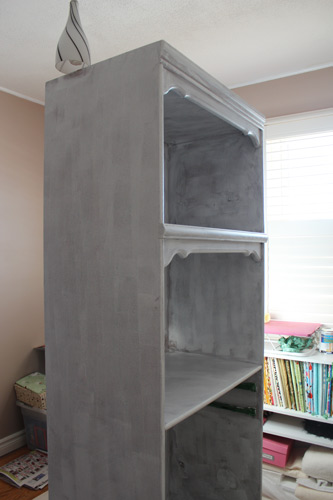
While I loved the shape of the desk, but one thing bothered me about it: the golden wood is a dated hue that really emphasized the size of the desk within the space (my craftroom is pretty small). It’s a press wood desk with laminate veneer that’s seen better days (ink spills, marker lines, etc), so I didn’t feel like I was destroying a precious wooden piece when I made the decision to completely paint it white to brighten it up.
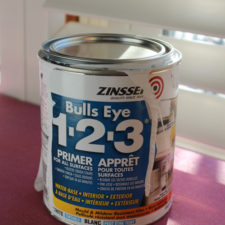
I wanted to get my craftroom set up as quickly as possible, so I wanted to avoid sanding as much as I could. Plus, sanding is a lot of work, especially if you don’t own a sander. After perusing the paint aisles of Canadian Tire, I settled on two products, both by Zinsser. The first was a primer by Zinsser called Bullseye 1-2-3. The second was an all-in-one interior paint with primer built in, also by Zinsser. I was really worried the dark wood would show through so I decided that more primer couldn’t hurt. Why not?
Supplies:
- Bullseye 1-2-3
- Interior Paint
- Drop cloth
- Paint rollers (one small, one large) and paint roller tray
- Paint Brush
- All-Purpose Cleaner
- Sandpaper (but only if necessary)
The process of transforming this desk took about two weekends for me (three if you count reattaching the hardware after waiting for the paint to cure), but you could do it in one weekend if you had the time blocked out nicely.
Step 1: Prep the Surfaces
As I already mentioned, I wanted to avoid sanding as much as possible. Since the primer I chose could be applied directly over any surface, including glossy ones, the only things I needed to do were:
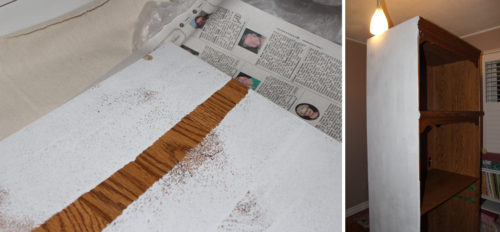
- remove all the shelves and drawers and arrange them around the room on the drop cloth
- clean all the surfaces
- dry all the surfaces thoroughly
- remove the hardware (drawer knobs)
- tape off hardware I didn’t want to remove (sliders for the drawers)
Step 2: Bullseye 1-2-3
Oh, the first roll of primer was the scariest, but I got over it quickly when I saw how smoothly this primer was rolling on. Seriously, using this product felt like magic. It rolled on easily, smoothly, and dried quickly. I used the wide rollers on most of the surfaces, the small rollers on smaller surfaces like the drawer front and trims, and I used the paint brush to cut into the interior corners and edges between where any two pieces connected. For the inside of the desk, I generally did the edges first like a border, then filled in the large areas with the rollers.
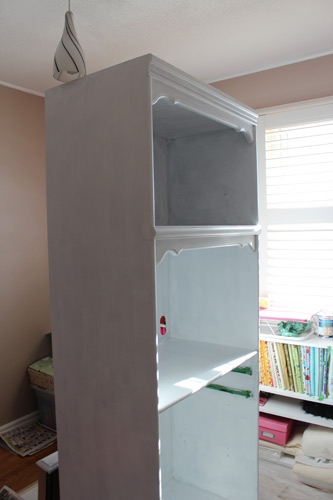
I spent about two hours painting all the surfaces, then let it dry for two hours. The first coat was pretty blotchy, so I was a bit nervous at this point.
My second coat took about an hour and a half to apply – I’m guessing I was a little more comfortable with the process by that point. I was starting to feel better at this point because the blotchiness was fading and it had more of a solid look. I used the entire can of Bullseye primer on these two coats, so I was really hoping that the interior paint would be enough to make a nice, streak-free finish.
I completed steps 1 and 2 over the course of one weekend.
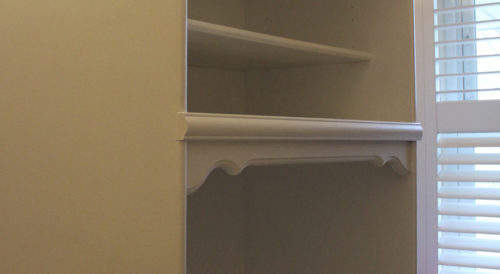
Step 3: The Final Coats
Keeping with plan of not sanding, I didn’t sand between coats of any coats of primer or paint. I did have to sand a few of my edges at the base of the unit because my drop cloth was lifting up and touching the finish of the paint, causing an uneven finish. You can read more about that in the lessons learned section below.
There’s not much to talk about. I followed the same course of action as the primer, first cutting into all the corners with the brush, then filling in the outlines with the paint rollers.
I used an interior paint with a primer built in, just in case my two primer layers weren’t enough. This was probably unnecessary, but I wanted to be sure that none of the wood grain showed through.
I applied two coats of this paint, for a total of four layers total between steps 2 and 3.
I completed step 3 over the course of a second weekend.
Step 4: Finishing Touches
Waiting one week for the paint to cure was torture! Finally, on the third weekend, the paint was fully cured and it was time to reattach the shelves, drawer, tray, and most importantly, the updated hardware!
Cost (The Damage)
- Desk: gift, $0.00
- Bullseye 1-2-3 946 mL: $11.99, Canadian Tire
- Interior Paint 946 mL: $15.79, Canadian Tire
- Drop cloth: $29.99, Canadian Tire
- Paint Roller Kit: (rollers, tray, terrible plastic drop cloth): $12.99, Canadian Tire
- Sandpaper $1.99, Corner Store
- Acrylic Hardware Knobs – $12.58, Lowe’s
- TOTAL COST: $85.33 + tax
If I remove the cost of the drop cloth from the project, since it will be reused for countless other DIY projects I foresee in my future, the cost of the consumables is $55.34. Fantastic price for a refinished desk with storage that fits so well with the room’s style.
Lessons Learned
This was my first time repainting a large piece of furniture (prior to this, I’ve really only repainted a craft shelf using one coat of standard acrylic craft paint). Needless to say, it was a bit of a learning experience! Learn from my blunders; here are the things that if I could go back in time, I would do differently.
- That inexpensive clear plastic paper-thin drop cloth that comes with the paint roller kits? Don’t use it. I had a large cloth drop cloth that I put on the floor. Since my paint roller kit came with a plastic drop cloth as well, I decided to put that on top of my big drop cloth to lengthen the life of my cloth drop cloth. Big mistake. The plastic one was so thin that it ripped easily, destroying the point of it. Additionally, every time the heat turned on, it would cause a slight breeze that would lift the plastic drop cloth up and it touched the sides of the unit. When I would come back to do the next layer, I would have to peel back that plastic that got stuck against the paint, and this led to some messy
- Less is more. Always do more thinner coats rather than a thick coat. Sometimes it looks like thin enough coverage, but it may drip later when you’re not around to notice. There are a few drip marks on my desk that I’m not a huge fan of.
- Prop it up! I originally placed my unit directly on the drop cloth. For my first few coats, it was hard to do the bottom edges since it was directly against the floor. When I was doing my final coats, my husband helped me lift the unit onto wooden blocks so I could get access to the edges better. What an improvement, and I wish I had done that from the get go.
I hope this before & after helps you if you are interested in doing a no-sand painted furniture project like this one! Any questions, let me know in the comments!