I’ve wanted an embroidery machine for years, but the cost of these fantastic machines had always prevented me from taking the plunge. That’s why when I saw this Singer Quantum Futura Embroidery machine pop up for auction on a local buy and sell group on Facebook with a starting bid of $150 back in October, I knew I wanted to get in on it. I heard that this was a good beginner machine, but the reviews were mixed online.
This was the listing photo that pulled me in: 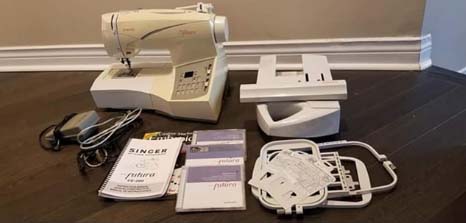
After the 24 hour auction with $1 increments was over, I won the bid at a whopping $152. Whoohoo!
Getting the machine up and running for embroidery was a huge pain. The machine itself worked wonderfully for sewing, but the software for the Futura that would actually allow the machine to do embroidery gave me a lot of issues. Unlike other embroidery machines, this machine does not have default designs built in. It uses your computer as the backbone to function, so if you can’t get the software installed, you basically have a regular sewing machine.
The problem is this machine is from the early 2000s and works best on older systems. My Windows 10 machine, no matter how I tried to patch it with the upgraded software patch, refused to work with my system. After a lot of trial and error (lots more error than I would have liked), I ended up purchasing a whole separate computer from a Kijiji seller that runs Windows XP, just for this little embroidery machine. That old computer did the trick and I was up and running!
My seller didn’t have all the software included, so I turned to my official Singer dealer for assistance. I’m lucky enough to have a Singer store in my city. Unluckily, despite the message on the official CE-200 software page that states that you can buy the software from a Singer dealer, they did not have the software available for the Hyperfont, Crosstitch, Photostitch, etc. There are sellers online on eBay who are distributing the software so I ended up going that route.
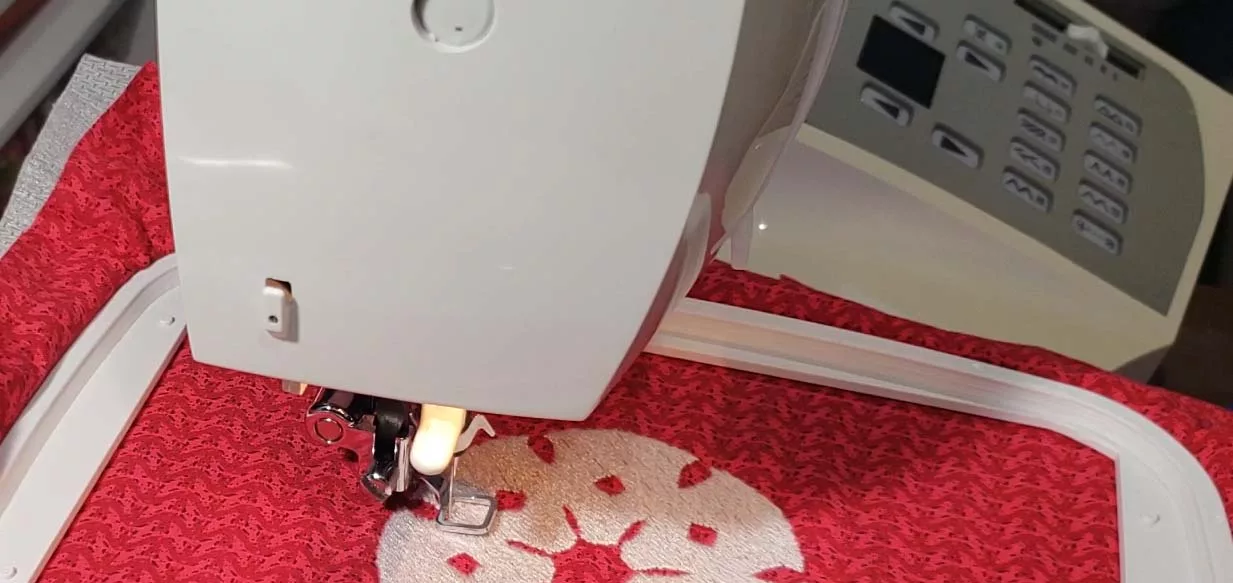
So far, playing around with it I’ve made some designs using the Autopunch and Hyperfont features, mostly to make designs for the front of my zipper pouches and for humorous catnip toys.
My Review of the Singer Quantum Futura CE-200
Keep in mind that this review is coming from someone who never used an embroidery machine before in her life.
I’m used to using vintage machines, but for a plastic machine, this feels pretty solid. Threading the machine was intuitive and easy. I liked having both the horizontal and vertical spool pin options for smooth unraveling of small and large spools of thread respectively.
The software for creating custom designs on the Futura is pretty clunky. As I have nothing to compare it to, and this is older software, I may just be unfairly comparing it to more modern PC software. Undoing and redoing steps never seemed to work as I would have expected. Usually if I made a mistake, I ended up clearing my workspace by starting a new canvas. To avoid having to fiddle around with positioning, I would try to make my final design outside of the software, then import it into Futura using the Autopunch feature.
How to Use the Autopunch Feature on the Singer Quantum Futura CE-200
I loved how easy it was to import designs into the Futura software. The key to successful output was to choose clip art style images – ones without a lot of shading, with solid blocks of colours and minimal details. Anything that was too complicated would create unexpected results with too many jump stitches between blocks.
I’ve created a video showing how to use the Autopunch feature on the Futura step-by-step. You can watch it below or over here on my YouTube channel.
For this video, I used a digital illustration I made using Paint Shop Pro years ago. To use Autopunch:
- Start by opening the Futura software.
- Click on the CREATE menu, then select Autopunch.
- Click the NEXT button.
- Click on the SELECT button.
- Find the image file you want to work with and press OK.
- Wait patiently while the software opens the image. On my system, this took about a minute. It will display a preview of the image you selected. Click on the NEXT button.
- You can change the physical size of the design. By default it shows in centimeters but you can change it to inches or millimeters if you prefer to using the units drop down menu. I’ve decided that my design will be 4 inches square. The default size may be bigger than the canvas size even allows so be sure it’s not too big for your hoop.
- Click NEXT.
- The Futura software will do the work of automatically reducing the colours, but you can also force it to reduce to only a few colours of your choice, if you prefer. The fewer colours you use, the fewer thread changes you’ll need, but your shapes may be less defined. It’s a good idea to select the “preview colour reduced picture” option if you are doing so so you can see if the reduction will be too drastic. Click NEXT when you’re ready.
- Next, you’ll choose your column width. Most likely you’ll want to keep it the 9mm default. I haven’t played around with this.
- Click NEXT and the software will begin simplifying your image to your specifications. This may take several minutes to complete, especially if your system is as slow as mine is.
- The Futura software will show you all the shapes it plans to embroider. In my case, it spit out outlines of all my shapes that I decided I didn’t need. In this case, I removed the unnecessary shapes one by one by selecting it and clicking the “Remove” button. I did this until I was left with only my main shape.
- If you have multiple shapes, there is the option of changing the order they will be stitched by clicking on the shape and then the Move Up or Move Down button. You can also decide on a shape-by-shape basis if you prefer to have a satin stitch or a fill stitch.
- Additionally, you can have it stitch a background if you are planning to use this embroidery design for a patch.
- When you’re ready, click Next.
- A nice feature of the auto punch is the fabric wizard. You can select a project type or fabric type, and the software will suggest what kind of fabric and what kind of stabilizer will work best for your design.
- There is also an option to choose how your machine will move between the shapes. You can use a jump stitch, which is a long thread joining the shapes that you can snip off later, or you can use a running stitch which is a series of smaller stitches between the shapes. I usually choose jump stitch. You can snip these threads and then pull the threads through to the back of the work.
- Click “Finish”. Your design will show in your canvas work space.
- You can save your design by clicking the File menu, then Save Design As.
- To transmit the design to the Singer Quantum Futura, click on the little sewing machine icon. It will ask you if you want to optimize your design for speed. Choose yes or no, your preference. It will show you a preview of your first shape, which will let you know what colour you need to have ready. Once your machine is threaded, click on Send Block. Load up your hoop, attach it to the machine and put down the presser foot. Push the green button to start the embroidery process.
- If you have more than one shape, the machine will stop and your computer will prompt you to send the next shape block. If you need to thread a new colour, that’s your opportunity to do so.
Be sure to monitor your machine while it does the heavy lifting for you! Make sure that your computer remains on for the duration of the process.
As I mentioned in my brief review, although you can import multiple items into the workspace of the Futura Software, I find the software is quite clunky. I try to get the elements of my design into one image so that there is less fussing around in the software itself.
View this post on Instagram
My source image for the design above was drawn by me using an older software, Paint Shop Pro. You can use a digital design software on your computer, or even your phone or tablet, to draw your designs digitally then save as a JPG. If you prefer to work more traditionally, draw and colour your design on paper and either scan or take a photo of it. Since your punching colour shapes, you’ll want to make sure that no matter what method you use to import your image into the software, that the colours will be solid blocks with minimal shading.
If you’re not an artist, you can import clip art or other images into the software. Just keep in mind what the copyright restrictions are for the source material so that you don’t get into legal issues. This is especially important if you are making things that are not just for your own personal use.
View this post on Instagram
I hope that this blog post has given you some insight into using the Singer Quantum Futura CE-200. I’m working on filming more about the basics of this machine (how to thread, etc), so watch back for that! If there is anything you want to know about this machine, feel free to leave a comment here or on my YouTube video.