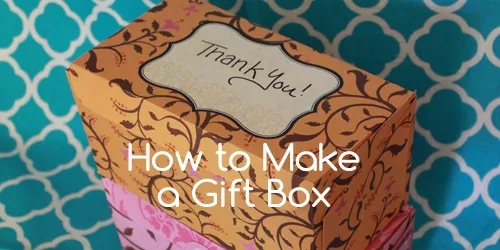
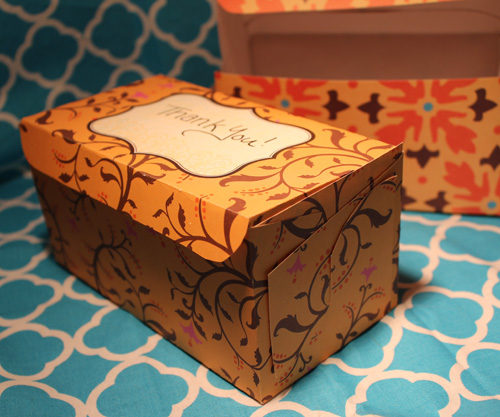
This tutorial will show you how to make a quick gift box out of two sheets of scrapbook paper. The thicker the cardstock, the sturdier it will be. The finished box measures 3″ x 3.25″ x 6″.
Supplies:
- Two sheets of patterned cardstock, preferably of the same print.
- Scissors
- Ruler
- Pencil
- Double-sided tape
- Embellishments if desired
- Printout of Craftcore 12×12 Gift Box Template Pieces PDF
Special note before you print the PDF. You must print at 100% scale; do not shrink to fit! Test to make sure your print came out at the right size by measuring the 1 inch print guide included on the sheet. If it’s smaller than 1 inch, print again at 100% scale.
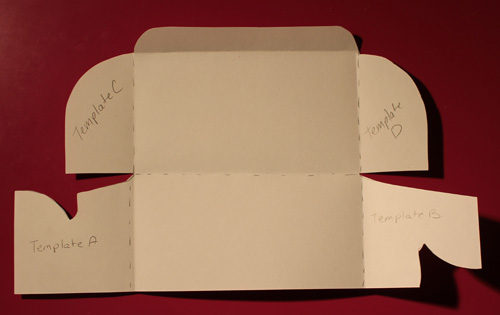
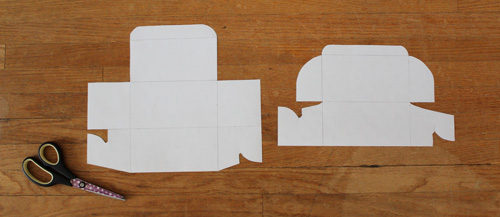
Sheet 1: The Lid
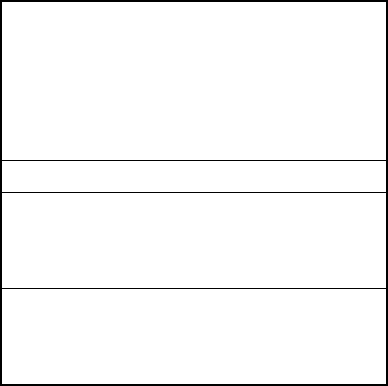
Take a sheet of 12×12 scrapbook paper. Flip it over so that you are making markings on the backside of your paper.

Draw a line from edge to edge exactly 3 inches from the bottom of the sheet.

Draw a second line parallel to the first line, exactly 3.25 inches away.

Draw a third line parallel to the second line, exactly 0.75 inches away.
Draw a line perpendicular to your three existing lines exactly 3 inches from the left edge of the paper.
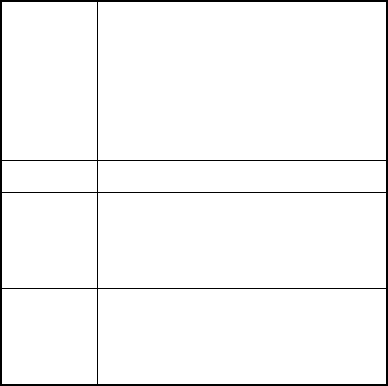
Draw another line exactly 3 inches from the right edge.
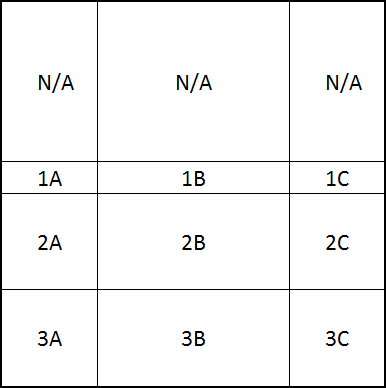
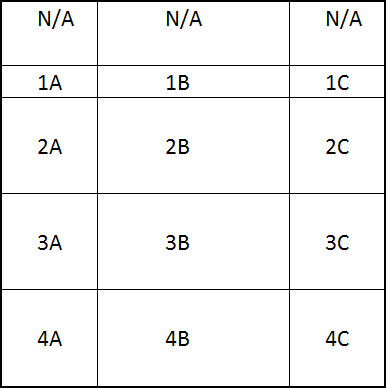
I’ve labeled the sections below for your reference:
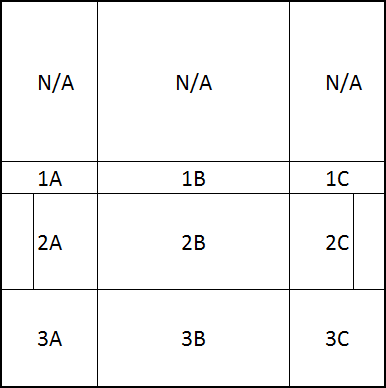
We are going to divide the two 3” wide sections 2A and 3C into two unequal halves. Draw a line 1.25” from the left side of 2A. Draw another line 1.25” from the right edge of 2.
We want to round out the top corner of 2A and 2C as per below. You can do it by eye or use Template C and Template D as a printable reference. (If you don’t have the template yet, go print it from the supplies section at the beginning of this article!)
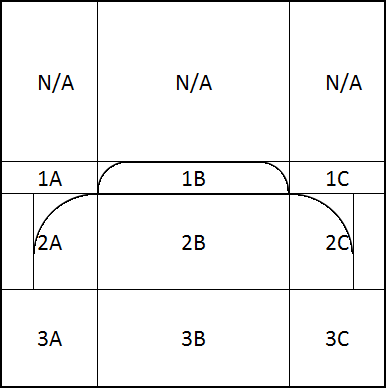
You can also round out the top left and top right corners of section 1B, which will become the outer flap of the gift box.
Lastly, you’ll need to trace out Template A onto 3A and Template B onto 3C.
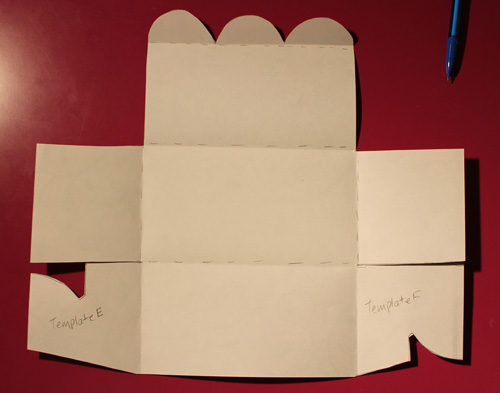
Cut out your paper as shown in the photograph below:
Sheet 2: The Base
Take another sheet of 12×12 scrapbook paper. Flip it over so that you are making markings on the backside of your paper.
Draw a line from edge to edge exactly 3 inches from one end.

Draw a second line parallel to the first line, exactly 3.25 inches away.
Draw a third line parallel to the second line, exactly 3 inches away.

Draw a fourth line parallel to the third line, exactly 1 inch away.
Draw a line perpendicular to these four lines, exactly 3 inches from the edge of the paper.
Draw a second line exactly 3 inches from the other edge of the paper.
Imagine your paper is labeled as shown below. You’ll need to apply the template shapes to the areas specified.
In section 4A, trace Template E.
In section 4C, trace Template F.
In section 1B, you have a few options to meet your style: you can leave it with sharp edges, you can round the corners at the top left and top right, or you could make scallops by tracing halves of three 2 inch circles.
Cut it out like in the photo below. Section 1B may be scalloped, curved, or left straight.
How to Assemble the Gift Box
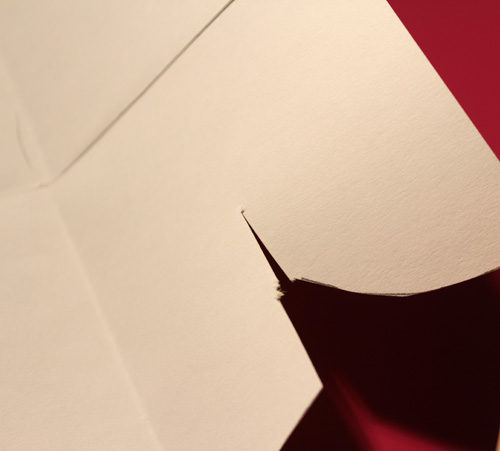
You now have two pieces, a lid piece and a base piece. You’ll just have to make four more snips on template A, B, E and F. Make a half-inch cut from the inward points towards the centre of the template piece like in the picture below.
You now have two pieces cut out.
It’s time to crease all the faint lines that you have drawn. Try to crease as firmly as possible so that the box holds its shape well.
Optional: you can erase all your pencil lines after creasing if you’d like. I didn’t worry since it’s so faint and the marks are only on the inside.
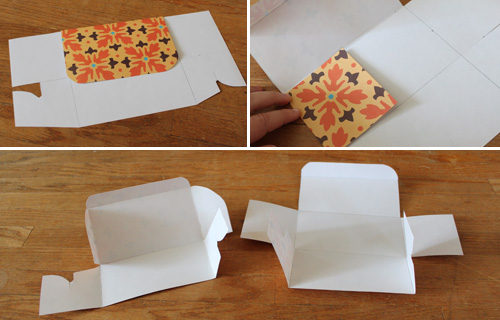
There are two ways to assemble this. 2B of Base and 3B of Lid need to be layered on top of each other. You can either have the flap of Base 1B on the outside or the inside. If you want the scallops on the outside (great if you are using two different patterned papers), put the double-sided tape on the patterned side of Lid 3B. If you want the scallops on the inside, put double-sided tape on the patterned side of Base 2B and Base 1B.
Fold into the box shape by bringing the fully rectangular sides up first. Then lock the two interlocking side piece into each other. I recommend taping into place using the double-sided tape for structural integrity, especially if you are using thin cardstock.
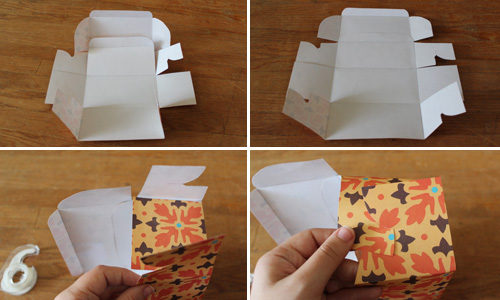
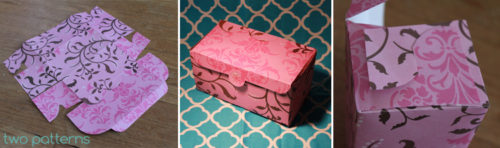
Then you’re done! You can embellish your gift box as desired, adding stickers, dimensional elements, ribbon etc. For the pink example above I added a circle on the flap to give the box the look of a latch.
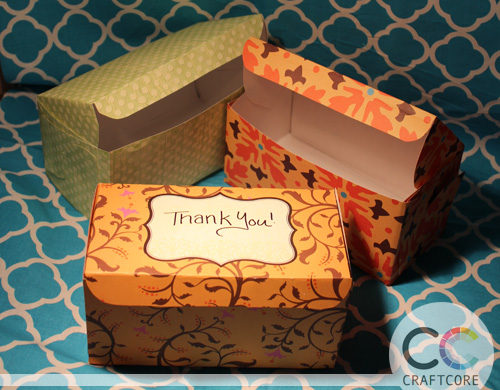
I hope your gift recipient enjoys the personalized gift box as much as the thoughtful gift placed inside.
